Search

Sunday 24 July 2011

Nail Art Shop - Striping Tape

Nail Art Shop - Striping Tape
You've probably had the bad experience of trying to paint perfectly uniform stripes onto a nail surface right? The stripes always come out wobbly and uneven.

Well no more! You can get perfectly consistent and even stripes every time with this nail art stripping tape from “Viva La Nails”. This tape is made from a very thin foil measuring just 1mm thick, just the perfect size for those attractively thin stripes.

Each roll of this material is several metres long, meaning that once you've bought one roll you won't have to purchase more for quite some time.

And at 2.95 per roll it's easy to afford several different varieties for mix and match. Striping tape comes in single colour varieties, sparkling patterns, and also more advanced two colour stripe patterns.

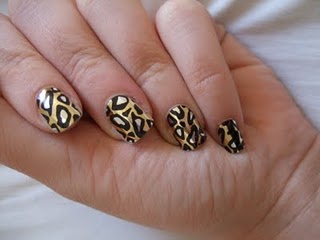
Striping tape is famous for providing a smooth and elegant look all by itself, but it can produce unusual and striking effects when mixed with other nail art accessories as well.

We sell all of our stripping tape in resealable plastic bags that take up a negligible amount of space, perfect for nail salons and mobile nail technicians alike.


Striping Tape - Silver
Price: £2.95
Striping Tape - Gold
Price: £2.95
Striping Tape - Pink
Price: £2.95
Striping Tape - White
Price: £2.95
Striping Tape - Red
Striping Tape - Red
Price: £2.95
Striping Tape - Azure
Price: £2.95
Striping Tape - Purple
Price: £2.95
Striping Tape - Blue
Price: £2.95
Striping Tape - Dark Blue
Price: £2.95
Striping Tape - Green
Price: £2.95
Striping Tape - Black
Price: £2.95


Saturday 23 July 2011

Oooooh Prety - Nail art Design Wild Nail Wraps

Oooooh Prety - Nail art Design Wild Nail Wraps
 Whilst at Primark last week I came across some little packs of nail wraps. I've never been too sure about nail wraps, I've heard a real mix of opinions, some people say they are better on toes than fingers, they don't wear very well, they are expensive! But on the good side there are great designs available which I have always admired like I'm a child in a sweet shop! As I have konad and bundle monster stamping kits I have always been content with replicating designs that way but when I found these at Primark I couldn't resist and at £3.00 it just had to be done!


I chose a gold Leopard print, I did see three other designs too. The pack contains 18 nail wraps (I'm not sure why its not twenty so you could get two full sets?!).
This is what they look like on the nails!


 Bangle £2.00 from Primark!


They are really easy to apply, you will need a nail file and a hair dryer to apply the wraps and you should have a gorgeous set of talons in less than 10 mins, plus no drying time required which is a huge bonus! All you need to do is gently buff the nail plate (just enough to take the shine off), gently apply the wrap and then with a hair dryer heat the wrap (be careful not to burn yourself) the wrap will now be more pliable so you can smooth it out across the nail. With the excess at the tip use a nail file to scrape over and it will gently break away. See easy!

To see how to apply the nail wraps take a look at my tutorial!


The down side to this pack is the sizes aren't great, I do have a couple of nails with gaps at the side but you wouldn't notice unless you are really inspecting them! For £3.00 they are a bargin and one tip I have is that you could use the excess pieces that you file off from your finger nail and apply them to your toes nails. In all honestly I don't know how long they will last but I have applied a top coat over the top to try and seal them a bit! I will keep you up to date on twitter to keep an eye out!

Have you tried other nail wraps? How did you get on with them? What are your recommendations for making them last longer? I would love to hear so please leave me some comments!


Friday 22 July 2011

Nail Art Shop - Rhinestones

Nail Art Shop - Rhinestones
As a nail technician, you need to have a large variety of options available to your clients to keep them happy. But what can you do to pacify clients who are looking for a classier high fashion attitude for their nail art?

I've located just the perfect product to satisfy this need.


Nail art rhinestones from “Viva La Nails” are elegant gemlike ornaments created from high quality plastic material with a reflective backing. These are perfect for creating designs that literally “jump out” at the viewer. The visual effect of properly applied rhinestones can be absolutely stunning.


These tiny gems are ready to be applied directly to the nail surface using a thin layer of nail polish. Place the rhinestone over this first layer, and then apply a second layer of polish once the first has dried. You might also consider using nail glue (but never super glue!) for a firmer adhesion.


Rhinestones come in over 100 (that's not a typo!) different styles at “Viva La Nails”. This makes it easy for you to satisfy the needs of even the pickiest clients. Relieved? I thought you would be!


Rhinestone Sets
Flowers
Hearts


Tears
Triangles
Drops


Stars
Metallic Rhinestones


Oooooh Prety - Nail art Design Strawberries And Cream

Oooooh Prety - Nail art Design Strawberries And Cream
My inspiration was this super sparkly ring that I got from Primark for £2.00! As well as the sparkles it is Wimbledon this week and as Strawberries and cream are symbolic (as well as the tennis obviously!) of the event I thought this was the perfect time for my strawberries and cream design!


To get the look I used a red and white nail varnish, Bundle monster plate BM05 for the strawberry and then red, green and white nail art paints.


And here is the final look!


I chose to do a reverse design on the ring finger but you could keep all the nails the same if you prefer!
I have had quite a few comments about my nails and a lot of people thought they were nail wraps! I love using the nail stamps as you can get the look of nail wraps with out the cost!

Check out my tutorial video to see how to get the look!


I hope you like this weeks design!


Thursday 21 July 2011

Oooooh Prety - Nail art Design Summer Nails

Oooooh Prety - Nail art Design Summer Nails
As my feet are no where near ready for a summer outing and certainly not in a fit state to be anywhere near a camera I have recreated the look on my finger nails!


I used Fiercely Fiona from OPI for the yellow base and then used nail art paints for the designs. 


In the magazine the model said she uses cocktail sticks / tooth picks to paint the design which is a great tip for any one who doesn't have nail art brushes. They also used nail varnish instead of nail art paint so recreating this design is easy as you can use things you already have!

I have used roughly the same colours as they have in the magazine but you could use what ever you like and put your own creative twist on it! This design is great for the summer and its super simple to do.


Design by Wordpress Theme | Bloggerized by Free Blogger Templates | coupon codes